Sunday 25 November 2007

Some actual scrapbooking for a change

I was so bored last night as there was nothing on the tv and dh was playing on the laptop all night. I decided to sand down and paint a board book i found for a pound. It is a loverly shape and i can see potential in it.

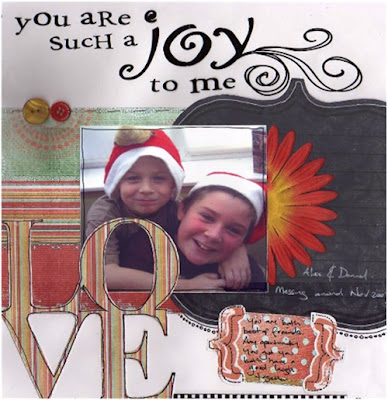
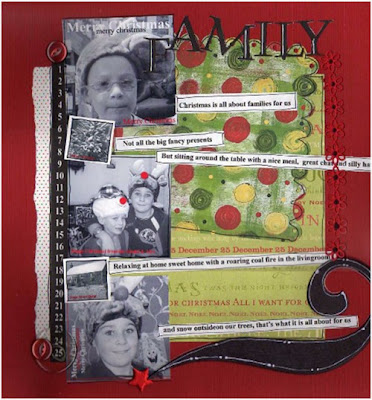
I then had paint leftover so decided to make a few lo's with it. The first one was made using left over christmas card scraps.


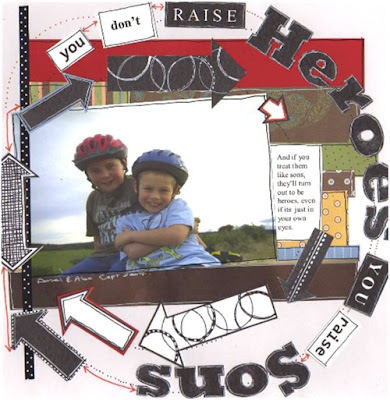
The next one was of alex. I was having a mini tidy up ready to start my christmas journal and get all my christmas bit together when i found the picture and a little mini album complete with paper and embellishments.


Off back to my painting now

Be back soon
Sarah

Saturday 24 November 2007

Crafty Bits

Firstly I have a shop warming present i made for Sandra to show you.


I made little houses from thick cardboard and painted them all white with emulsion. I then decorated them with a variety of scraps and embellished with eyelets, buttons and ribbons.

I have finally finished a LO i started at our crop last week as well. This is another christmas LO that i am thinking of framing up as a present.


I used alot of the digital stuff from shabby princess and made my title by printing on acetate.

And finally i have made a christmas journal. My mum has signed up for the journal your christmas class from Shimelle. She has been so excited by the whole process that her enthusiam has rubbed off on me, so i thought i'd give it a go. I made my own album using a sheet of A4 mountboard.


Here is how i did it if you would like to have ago.

1. Cut an A4 piece of mountboard in half. Sand off any rough edges now

2. Choose a patterned paper.

3. Cut around the mountboard with a half inch gap around the outside.

4. Cover the mountboard with double sided tape or strong wet glue and place it onto the patterned paper.

5. Add more double sided tape to the reverse (inside cover) and turn over the edges.

6. Cut a piece of plain carstock to cover the edges and again secure with double sided tape or glue.

7. That is the front cover now made. Repeat the process with the back cover.

8. My patterned paper had a slight twirl pattern on it. I used a black pen and a white pen to pick out some bits on the paper.

9. I then used matt accents to highlight these twirls.

10. I repeated this process until i had a good raised layer and embossed effect.

11. I used walnut ink around the twirls once they were dry to age the cover.

12. I added green ribbon and white lace to the cover.

13. I added homemade mountboard embellishments and tags to complete the look.

14. I added cream pages and then bound it all together with my wonderful bind it all.

I cant wait to get started putting it all together.

Thanks for looking
Sarah

Thursday 22 November 2007

An exciting new craft shop

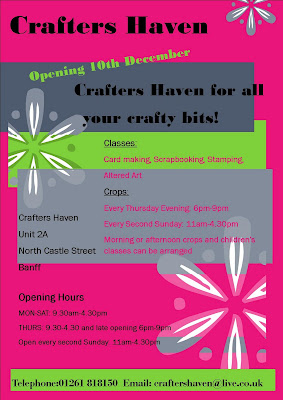
Sandra who runs our crop in Macduff has finally decided to open her own craft shop. We have very little in the way of craft shops up here in the NE of Scotland so a new and exciting craft shop is greatly welcomed.

The grand opening will be in a couple of weeks on the 10th December 2007. More details can be found in the poster below that i have made for Sandra.


I cant wait to get my hands on some new stash, especially all the bind it all equipment that i spied at our last crop.

And hopefully in the new year, i shall be teaching a class or two there as well. I am a bit nervous about that but i shall try my best to come up with some bright and funky classes.

So if you are in the banff area, why not pop along to the new shop.

An another note, Sandra has also had confirmation from Dyan at Blonde Moments about coming back up to Scotland in September next year for another scrap attack organised by Sandra and our crop. It will be 13th and 14th of September 2008. Sandra is still ironing out the details, so watch this space. The event was a massive success and a great time was had by all. See older posts here for details.

Right off for my beauty sleep.
TFL

Sarah

Wednesday 14 November 2007

my advent calendar screen


Here is my advent calendar. I made it from 3 sheets of a4 mount board, 3 sheets of 12x 12, brads, paperclips, number stickers, ribbons and rub ons. I saw this originally in a magazine as a 12 days of christmas screen but i adapted it into a 3 screened version.

here is how i did it.

1. Lay the 3 sheets of mountboard down flat and draw a border around each one. I went for 1.5 cm on the sides and top and 3 cm on the bottom. This wall form the guide for the top, side and bottom edges of the doors.

2. Now is the time to draw the doors. sketch out the doors in pencil. I gave the first and third pannel 8 doors and the second panel 9 doors.

3. The doors should be around 5 x 7cm each with a larger one filling the space, but you can chop and change at this point. I left around 1.5 cm gap between each door to allow for the hinges.

4. Now is the time to cut all the doors out. I found using a craft knife, mat and metal ruler worked best for me.

5. Once all doors are cut out, decorate the fronts. I used plain cardstock on the fronts. Use a wet glue to cover the front of the frames. Add the cardstock. Turn over and cut out the windows from the cardstock.

6. Sand down the edges of the windows to give a distressed look. i also inked with brown ink as well. If i was going to do this again, i might miss this stage out and just paint the screens in my chosen colours.

7. set aside and leave to dry.

8. Now to tackle the doors. Sand down the edges of each door by a few millimeters. This allows the doors to go back into the windows loosely.

9. Cover the doors with patterned paper and again sand and ink the edges. I had about 8 different designs which i tried to mix up per screen.

10. For the openings per door i made mountboard circles. i again covered in the pattered paper and inked.

11. To some of the circles i super glued large brass paper clips and to some of them i attached coordinated ribbons.

12. To attache the doors to the windows i made paper hinges. I cut 2 cm strips of brass coloured card. I then scored each one down the middle with a embossing tool. I cut them into 2.5 cm pieces.

13. Using my eyelet setter, i punched 4 holes into each piece.

14. I used a dab of herma glue on each hinge to attache temperarily onto the door and frame so i could mark my position for the pilet holes for the brads.

15. I again used my eyelet maker and the smallest diameter to make my holes on the door and frame.

16. Now is the time to put it all together. Use small brads to attache the hinges. I went for brass coloured ones.

17. I used the same process to make 6 larger hinges to attache the 3 screens together using larger brass brads.

18. The calendar screen is almost complete now. Attach the mountboard circles randomly around the 3 screens and attach numbers also in a random manner.

19. Add rub ons and ribbons along the bottom edge to decorate.

20. I have decided i would like photographs of the boys behind each door in my advent calendar. This year i want to have the boys in silly hats and poses holding up numbers. I will herma these pictures in place behind each window.

21. As i want to be able to change the pictures in future years to make this a memory keepsake i think the backing covers of each screen will be on same kind of velcro so it can be opened and shut without damaging the back.

This was relatively easy to make but very time consuming punching all the holes.

I hope you like it. Please leave a comment to let me know what you think.

Friday 9 November 2007

Other crafty projects occupying my hands

As i am a student now and on a budget, i have decided to make my own Chritmas presents.

Here is my first one. It is a candle. I saw something similar in a magazine so adapted it to my needs. Here is how i made it.

1. Select the candle. I went for a large white one.

2. select your photo and print. I turned mine black and white for a more traditional effect. I made a rough template of the size of image to fit the candle and then printed onto white vellum paper.

3. I attached the vellum using a narrow double sided tape top and bottom on the paper and secured down the seam using tiny heart shaped brads pushed into the candle.

4. Attach a strip of christmas paper and ribbon to cover the DS tape at the bottom.

5. Attach ribbon at the top to cover DS tape.

6. I made a chain of fine silver wire threaded with varius sized beads and then wrapped it around the candle.

7. I embellished with Queen and co felt fusion in white.

Do remember to explain this is a gift and not to be used as a candle if you make one yourself.


What do you think, would you be happy to recieve this as a gift for xmas. Leave a comment and let me know.

Here is a little peak at my latest project- a christmas advent calendar screen for my fire place. It is a big job and taking me longer than i expected.


TFL

Sarah

Carolinez Craftze

Its cyber crop time again over at Carolinez craftze. Its a more relaxed affair this time with each DT member getting the same kit so we can pick and choose what we wont to do. So far I have only done 1 LO but i have had a mini photo session with the boys and have lots of pictures now in reserve ready,lol

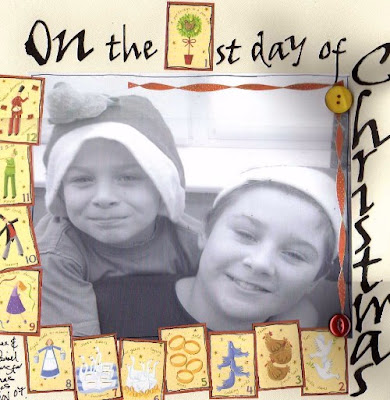
Here is my LO based on Laura's 1st day of christmas LO


I will update this post with more finished projects as i go along. I quite fancy getting the paints out again for Willows class from today, watch this space.

Update
Here is another LO form the CC. This time it is one of Willows. The class was to use paint as your main feature.


TFL
Sarah

Blog till you drop

My loverly team leader Charli is a DT member for crop till you drop. They have a cool blog to go with the shop called blog till you drop. They have a weekly challenge which each design team member sets.

I have done a few challenges over the last few weeks.

My first was using a sketch challenge


The second was to use acetate in a project. As i am on a maze book craze at the moment i made a halloween book. I cut out windows in the pages and filled them with home made halloween acetate. The look was really effective.


I have another one of Charli's which is another sketch challenge sitting in my craft inbox to do.

Bye for now

Update

Were do i start. Firstly some pics from the cyber crop over at uks.
This first one was for Mary Anne's magpie moments challenge. This got second prize in the end which wins me a 3 month's subscription to scrapbook inspirations and will maybe go in the mag.


This one was for the point to it challenge


And this one was for the digital quote challenge and shows my mum in all her witchy glory, lol


I also have a LO for the interhouse monthly challenge which i also won this month.


I finally got round to making a LO of Alex's nativity play from last year as well.


Here are a few more. The quality is not great as camera is pants at the moment.
This was for the home decor class. I did not get the kit so used my own stash. i made a plaque for my craft room using a paper mache heart base that i got at our scrapattack blonde moments event.


I then got carried away and could not stop making little alphabets. I made name plated for the boys doors. They again were originally door handle hangers that i customised for them by putting a picture of them in the handle gap.


Then there was the ATC calendar as well.\Now this is a really bad shot.


And finally the what no paper challenge. I decided to make myself a ribbon box for all my hundreds of ribbons. It is so handy being able to see at a glance what i have to match my LO.


And i think that is finally it for UKS cyber crop stuff.

TFL
Sarah

Check out my Slide Show!

I will be back soon to update

I have been so snowed under with uni work that i have been neglecting this blog. I have loads of pics and projects to upload so shall be back soon

Sarah