Tuesday 29 January 2008

BIA samples for Crafters Haven Shop, Banff

I have been making lots of samples for Sandra's new shop. I have used mostly the blonde moments range as that is Sandra's main range at the moment. I also made lots of BIA projects are Sandra carries all the zutter range, including precut covers, wires and the BIA themselves.


First the BIA projects

The first one was a arrow book of the biys. I used a arrow theme to tie in with the new blonde moments papers and cordinating stamps. I cut mountboard into arrow shapes. I made the outside covers slightly bigger as well. I painted one side of each arrow and then covered the other side of each with coordinated blonde moments papers. I cut the pictures to fit, all quirky sizes and embellished with arrows, offcuts and hearts from the paper.


Next was a gate fold album. I used the spring fling papers, actylic paints amd glossey accents. I cut out some of the large flowers from the paper and embossed them with glossey accents. I cut the papers inside to all different sizes ready for decoration.


The next one is a really personal one for me. It is a compilation of photos of my late beloved dog Clause. I made this one with little pocket pages. Each tab pullsout to reveal another little picture od clausey. I also stuck photos together as pages and punched them.


Lastly, just a few little notebooks i made with some off cuts.


And some little cards i made with the off cuts and blonde moments ultra thick embossing powder.


Tfl as always
Sarah

Monday 28 January 2008

Elsie Flannigan Challenges

Here is the next installment of this wonderful challenge over on UKS.

Challenge 3 was to border a photo with buttons, ribbon embellishments etc. So here goes, my version.


I used ribbons and lace to border two sides and buttons and felt circles on the other two sides with a few eyelets thrown in as well.

Challenge 4 was to make your own embellishments. I made a journalling tag, heart and buttons from chipboard. I laced together two blonde moments Patterned papers after i punched them with my BIA. I embellished with lots of buttons again.


Thats all tonight folks as i feel washed out.

TFL as always
Sarah

Thursday 24 January 2008

instructions for the maze book

I have been making lots of these cute little books lately and have been asked a few times what they are and how you make them. So here goes

A miniature book using a single sheet of 12 x 12 cardstock. All it takes is a little bit of folding, three simple cuts, some good gluing techniques and the basic book is ready for photos and embellishments. This colorful book makes a great gift or a pocket-sized scrapbook to show off those holiday photos.

You will need

• Bookbinding Adhesive or strong liquid glue
• Patterned paper of your choice for front/back covers
• 12 x 12 Plain Cardstock, one sheet
• Bone Folder
• Foam Brush or glue applicator
• Cutting Mat
• Craft Knife
• Ruler
• 1/4" Ribbon, about 1 yard
• Two 3 ¼ x 3 ¼ Mat Board Squares for front/back cover or suitable thick chipboard

To start your maze book, fold a sheet of plain cardstock in half. Use a bone folder to reinforce the fold. Fold each free edge of the cardstock back to the center fold. Your cardstock piece should now resemble the letter “W”. Reinforce the folds with the bone folder.

Open the cardstock up. Fold in half again in the opposite direction from the first fold in Step 1. Fold each free edge of the cardstock back to the center fold. Reinforce the folds with the bone folder.

Open up the cardstock. The folds have now created sixteen squares that measure about 3 x 3 each.

Unfold the cardstock on top of a cutting mat. Lay a ruler along the right vertical fold. Using a craft knife, cut along the right vertical fold. Start at the top horizontal fold and cut all the way to the bottom edge. Make a second identical cut along the left vertical fold. Make a third cut along the middle fold, but this time start cutting from the top edge and stop cutting when you reach the bottom horizontal fold. The cuts in the cardstock form an “M”.

Now follow the maze to fold the cardstock into the book pages. Start folding the left leg along the folds. When you reach the top, fold the stack over to the next leg, following the natural fold. Fold the piece to the bottom following the existing folds again. When you reach the bottom, fold the stack over to the next leg. Fold back up the leg. At the top, again fold the stack over to the next leg. Fold down the leg to complete folding the maze pages. Set the pages aside.

To make the front/back covers, squeeze a line of glue onto the center of a 3 ¼ x 3 ¼ piece of mat board. Use a foam brush to spread the glue over the entire surface of the mat board, working from the center out to the edges.

Place the mat board, glue side down, onto the center of a 4 ¼ x 4 ¼ piece of plain card. Create mitered corners. Begin by cutting off the corners of the cardstock, 1/16of an inch from the corner of the mat board.

Using the bone folder, score the cardstock along the edges of the mat board. Then fold the cardstock flaps around mat board to train the cardstock to its final placement. Squeeze a line of glue along the join line where the mat board and cardstock meet on each flap. Use a foam brush to spread the adhesive across the entire surface of each flap. Wrap one of the flaps around the mat board and smooth it down. Hold it in place for a few seconds. Then wrap the opposite flap around the mat board.

Use the tip of the bone folder and fold in the little overhanging flap of cardstock at each corner, just like folding in the sides when wrapping a package. Wrap the two remaining flaps around the mat board. While the glue is still wet, run the side of the bone folder along the edges of the covered mat board to square off the edges. Repeat the steps to create the second cover for the maze book.

To begin assembling the book, lay the two covers side by side about 1/2" apart on the work surface with the inside facing up. Run a line of glue horizontally across the center of each cover. Smooth out the adhesive slightly using the foam brush.

Lay a 12" piece of ribbon across the glue line so there is an equal amount of ribbon on either side of the covers and smooth the ribbon down.

Isolate one of the 2 outer flaps of the maze pages. Squeeze a spiral line of glue onto the flap. Use the foam brush and spread the glue across the entire surface of the flap, working from the center out to the edges.

Center the flap on one of the covers and press down. Apply glue to the remaining end flap of the maze pages being careful to keep the adhesive off the subsequent pages and adhere it to the remaining cover. The book is now assembled and ready for photos and embellishments.

You’ve just completed your Maze Book.

I have been making them with the BIA as well lately. The only thing i did differently was to slightly trim the front and back pages before attaching to the covers, it works a treat.

Hope that helps

Sarah
Wednesday 23 January 2008

BIA Maze book

I love making little maze books. They are so quick to make and they look just stunning. I make alot for swaps on UKS. Whilst making one recently i wondered what it would look like with a BIA fastening instead of the traditional ribbon, so i tried it. I was overjoyed with the result and found it hard to part with for the swap.

So i decided to make another one. This one was started at the demo day at Sandra's new shop. I used the blonde moments new range for the covers and decorated the inside with more blonde moments and love elsie papers and cotton self adhesive papers.

I embellished with coordinated pink and green buttons and matching white, black and brown ribbon. I used a brown 3/4 " BIA wire to keep it together.


I am so in to pink and Love at the moment, lol

Thanks for looking
Sarah

Monday 21 January 2008

A to Z journal of life

Just realised that i have not uploaded my A.

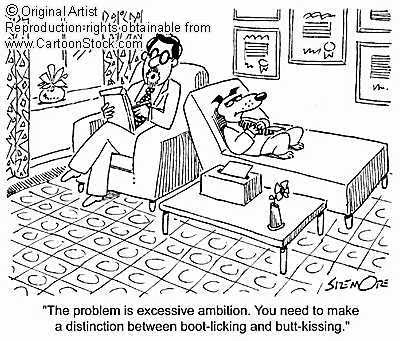
A is for ambition.


My journalling reads " I have a plan in life. I have made a start on this plan. I am gaining my degree at college at 32. I want better future prospects. I want to be a scientist in industry, achieving this is my ambition.

Every morning i wake up looking forward to what i can accomplish. I realise the power of ambition is the power of change. This is my journey that will lead to change.....

I have chosen my path, taken control...I will be a chemist, scientific researcher, work in the oil industry or the environment industry, but i will do it, it is my ambition.

This is hopefully thestyle i want to go along, paint and lots of journalling

Here are a few things i found on the net whilst doing reseach. They appealled to me and made me smile.


Crafty weekend

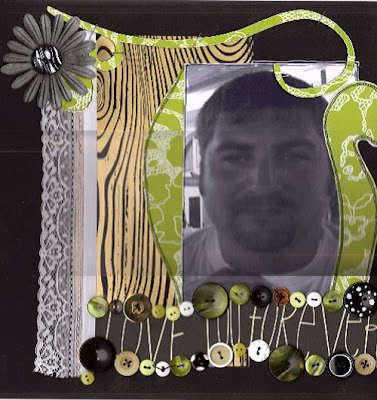
Firstly i completed challenge 2 for the 52 scrapbook challenges by Elsie Flannigan. I used a hambly overlay on this LO. It was the woodgrain one which was quite contempary. This lended itself to a funky LO i think.


Next i made a word book, Love. This project was based on the bo bunny books
The book was made using 2 sheets of A4 mountboard. Each sheet was cut down length wise. I rinted love on the pc to the required size, in this case 4". I then placed each letter on the end of each piece and handcut it out. I sanded the edges for a nice smooth finish and then covered in patterned pape.

I chose a red, black and pink thme. I covered each letter in alternative colouredf papers, red, black, red, black. I decorated with ribbon, threads and buttons and flowers.

I filled it with pics of the boys and keith.


I am back to college tomorrow so i have to get my folders ready tonight.

TFL
Sarah

Tuesday 15 January 2008

Elsie Flannigan: 52 scrapbooking challenges

Here is my first LO for the challenge.

I used some of the new blonde moments papers from sandra's shop, and some elsie papers for a splash of pink. The challenge was to use journalling strips on a LO. I hand cut all the doodles and swirls, before i found out sandra has swirls on her cricut cutter, doh.

prima flowers are from my monthly challenge prize from UKS.


One day, two to go before i am on track

Off to bed
See you later
Sarah

Not a very merry Christmas or a new year

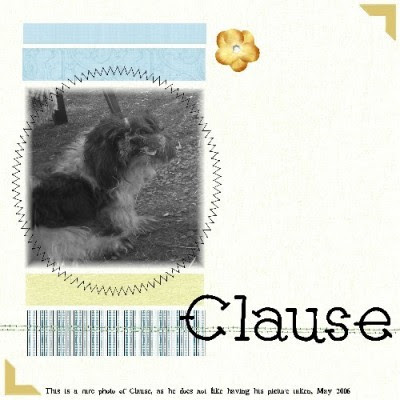
We have not had a great time over the last few weeks. firstly our beautiful, best Shih tzu in the world unecpectable died on boxing day. I cant bring myself to explain how as it is still very raw and painful and we still miss him daily at the moment. He got a cold and a cought over the cold snap we had and it just put a lot of strain on his heart and he just could not cope. He passed away being cuddled by keith, blub, blub.

I made a LO the next day as a way to cope with the loss.


Secondly, as we were so upset at the loss of clausey and could not bare to be in the house, we drove down to Cheshire to see the family and Grandad who was feeling under the weather after recently being in hospital for a chest infection.

We got there on the friday but Grandad had a fall on the saturday morning and was admitted to hospital. He was really weak as he contracted the hospital superbug, C Diff, whilst in there the last time. His heart gave up and he passed away on the sunday morning. We are all so upset as 77 is not really a old age. Once it is not so raw i will gather all our pictures together and make some LO's for a wonderful man, (sorry mum if you read this and it makes you sad)


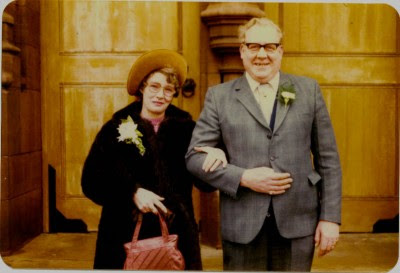
This is my Late nan and Grandad at my uncle Michael's wedding in the mid 1970's.

We stayed in Cheshire until the funeral which was on Thursday just gone and then drove home on the Friday. I was doing my first lot of craft demonstrations at Sandra's new shop in Banff, Crafters Haven. I was just a bit nervous but it was great in the end. The bind it all went down a treat. I made lots of samples which i will upload soon and sandra made a few really nice tag type books as well.

I have so many ideas whipping around my head for classes as well. I am also holding the fort at the shop soon as well, better learn how to use the till!!!!!, lol

I have decided to cheer myself up by taking part in some challenges over on UKS. I am hoping to do the Elsie Flannigan 52 scrapbook challenges one and the A to Z journal.

I made my journal last night using 7 gypsies paper, basic grey paper, agrylic paints, basic grey chip board letters, ribbons and blonde moments ultra thick embossing powder. I bound it all with the trusty bind it all and some 1 and 3/4 " red wires i got from Rosemerry Merry's crab apple shop in Keith's home town of Frodsham, cheshire. such a great shop.

My A to Z journal of Life


I have my first elsie Lo to finish tonight and my A in my Journal.

Off to cook the tea now, sausage casserole but the kids are not happy with that, good job i have a treat for them, mini profiteroles, yum, yum

bye for now
Sarah